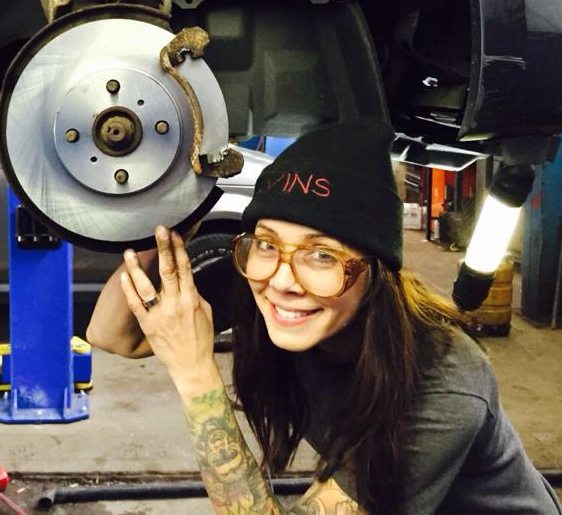
Master mechanic/goddess of metal Mary Bielich of Derkéta (day job: Honda automotive technician) has plenty to say about ripping things up on stage, on tour and under the hood. Take notes.
Holy global summer music festivals and shows, Earthlings…
…Interstellar transmissions are bringing us back to THIS planet as its inhabitants are hopping into their buggies and rocketing off to shows ALL across the globe AS WE SPEAK!
Playing in Pensacola, Pittsburgh, Poughkeepsie or Pymatuning? Heading to Houston, Helena or Hot Springs for harmonious holiday hijinks?
You NEED to take few minutes prior to blast-off to ensure that your transport is fueled up, tuned up and ready to roll!
Time is of the essence, as the countdown has already begun, so, for quite possibly the first time in my existence, I’m going to attempt to keep the yappin’ to a minimum and the trip tips to a max. (That’s one small step for Mary, one giant leap for the Deciblog universe!)
We’re talking about TRIP CHECKS today, friends…
…TRIP CHECKS.
We’re talking about the simple, quickie things that you can do and at which you can peek to prevent an interruption in your vehicular pilgrimage to live metal, hardcore, punk rock…Outlaw country?! These checks are necessary for the buggies of ALL fanfolk, fabulous and foul alike!
Let’s hit it.
**MOST IMPORTANT TIP: HAVE A BACK-UP PLAN BEFORE YOU LEAVE, including the following:
– A AAA Membership, Dealership Roadside Assistance Membership or ON-STAR subscription!
– Emergency contact numbers — Write them out and throw them in the glove box in case your phone goes KAPUT!
– A car phone charger!
(Tech tip: If you must charge your phone mid-travel, do it when the car is running, if possible, so that you don’t drain your buggy battery. In other words, don’t be a “parasite,” parasite lady!)**
NEXT… Before you hit the road, give the below-mentioned things a lookie-look, m’kay:
— YOUR VIN (Vehicle Identification Number) —
This combo of 17 numbers and letters is the THUMBPRINT of your vehicle. There is NO other vehicle on this planet – none other in the universe – that possesses the same number. Everything that you or anyone will ever need to know to service your vehicle is included in this number. If at any point you need to obtain specific info on YOUR buggy, or if you require assistance and need to acquire info on your car to pass along to a specialist or mechanic to access information, specs, parts, etc, you can do it through the VIN. This number is located on the factory sticker that lives on the doorjamb/driver’s side door, on a placard below your windshield on the driver’s side (visible from the outside of the vehicle) and on the engine.
— YOUR TIRES —
Yep, these rubber rings were the basis of an entire blog, as they are what keeps your car cruisin’ on the concrete.
**POR FAVOR: Check out that very blog for a full explanation on what you need to service them, what you should carry WITH you, and what to do if you blow-out on the road.**
MAKE SURE THAT YOU HAVE SUFFICIENT TREAD DEPTH ON ALL OF YOUR TIRES, including the spare or “donut,” and confirm that all tires are wearing evenly. Ensure that they are absent of baldness and that no belts in any of them have decided to peek out of the rubber to say, “Hi!” If you are traveling cross-country, the thicker the tread, the better! Going just a few hours away? Enough tread to safely navigate through rainstorms and rough roads will do. (You generally start thinking about replacement when you are below 5/32nds of an inch, if that helps.)
Check your tire PSI (tire pressure) and make sure that all tires are set to spec (factory specification)! Toss a tire pressure gauge in your glovebox if one does not already reside there. The magical tire PSI number(s) can be found on the driver’s side doorjamb OR on the driver’s side door, on the sticker that contains the rest of the info about your tires, including required tire size for your vehicle. If you do not have a sticker for any reason, consult Dr. Google with your year/make/model, call a dealer for your make and ask them, or work within a range of about 30-35 PSI. Check the PSI of all tires regularly on the trip, because a steady drop in PSI in one particular tire can indicate a small, hard-to-detect leak, that could result in a flat. Yuk.
— YOUR FLUIDS —
Not your morning coffee, not your boozy offerings over the weekend, not your electrolyte-infused Brawndo hangover-morning-after concoctions, and certainly not the kinds you hope to be “exchanging” with that special Faceypage friend you’ve had a hankerin’ to meet up close – and personally – for the past two years. (Again – and this time with feeling – YUK.)
Flip up your hood and take a peek.
You will see reservoirs and tanks that contain various fluids, all labeled. Some fluids are there to run hydraulic systems, some to lubricate systems, some to clean and some to cool/heat.
Check the levels of the tanks/reservoirs for each system and make sure they meet the mark, literally, of where they are supposed to be. Most systems are closed, or sealed systems, which means that a low fluid level indicates excessive wear or leaks, so you want confirm that those systems are leak-free, that the fluids are not murky and that the levels are set to spec (factory specification).
(Tech tip: Fill all fluids to the “Full” lines on the reservoirs/tanks – DO NOT OVERFILL – “Full” means to the line that says “Full” – varying temps and system pressurization causes fluids to expand and contract, and the indicated “full” levels give room for this.)
OIL:
Pull out your dipstick (Hey, now…) – It should be labeled “Engine Oil”. The handle can be colored yellow or sometimes orange (newer Hondas), and it lives on the engine block. Remove it and wipe it clean. Then, re-insert it ALL OF THE WAY, pull it back out and check the level and color. (NOTE: If you don’t insert the stick ALL of the way in, you will obtain a false reading.) A marker space is featured on the stick, indicating a safe level of operation. The “safe” zone is in the middle or on the higher side of the marker space, towards, at or SLIGHTLY above the “Full” marking. The “service” or “add oil” zone is towards, at or below the “Low” mark. The color of your oil should be clear, golden or even golden-amber. Dark brown or black oil indicates neglect of your maintenance services and oil changes. If you are not sure when you last serviced your buggy and the oil is dark, then play it safe and splurge for an oil/filter change.
If the level is cush and the color fine, you’re SET. If the color is good, but the level is low, peek under your car and make sure you’re not leaking anything on the ground, which can indicate a breach in the system. Color good, no drips, just a little low? Top it off with the oil that is recommended for your year/make model (on the oil cap or in the manual), add about one 1/4 of a quart at a time and re-check your level after each addition of oil. DON’T OVERFILL. When you’re in the “safe” zone, replace and tighten the oil cap and move on to the next reservoir.
IMPORTANT: Oil is the BLOOD of your buggy. It lubricates so, so many of the mechanical parts of your vehicle and provides “nutrition” to your engine. Keep it clean, folks!
WINDSHIELD WASHER FLUID:
THIS IS THE ONLY RESERVOIR/TANK THAT YOU CAN SAFELY FILL TO THE CAP, so go nuts, and pour away, but MAKE SURE your are putting the RIGHT FLUID (wiper fluid) into the RIGHT SYSTEM.
BRAKE FLUID:
A low brake fluid level indicates excessive wear in the braking system, a hose or line leak or a master cylinder leak. If your brake fluid level is below the “minimum” mark, boogie over to your mechanic before you set sail and have him/her check your brakes, hoses and lines. They may be fine and just wearing low, but that call is best left to an experienced mechanic if you are not sure what you are looking for in this department. The color should be golden, and dark fluid indicated a loss of effectiveness in the fluid for this system based on hydraulics – You can also consult with a reputable mechanic to see if it’s time to flush and replace that system.
POWER STEERING FLUID:
Ever hear a whining when you turn your wheel to the left or to the right when you’re not moving? Check your power steering fluid level. Whoa – In this case, check the reservoir regardless, as this fluid “drives” your power steering rack and, for obvious reasons, you want to make sure that the level is good for optimum steering safety and performance and to assure that the system is free of leaks.
COOLANT:

We’re checking the coolant RESERVOIR, NOT the radiator, folks.
IMPORTANT: Though the reservoir in most newer vehicle is NOT pressurized, PLEASE err on the side of caution, and don’t remove the tank cap unless the car, rad and engine have fully cooled down. Better safe than sorry, kiddos.
The coolant reservoir is PLASTIC and transparent enough to determine if the fluid level is “Full/Hot” or “Low/Cool”. Coolant is chemically designed to expand and contract in conjunction with the running temp of the vehicle. When the car is running – or running hot – the coolant expands, and a pressure relief valve opens, allowing the expanded, excess coolant to flow into the reservoir. When the car is turned off and no longer running and the engine cools, the coolant cools and contracts and then flows back into the engine. If you spring a leak in a rad hose or line, or if your radiator suffers a puncture and/or is degrading, the fluid in the coolant reservoir will allow the system to draw coolant from it IF NEEDED. ALSO: A low fluid level is an indication that you MAY have a leak, so if nothing else, monitor the level for that reason.
Only add coolant to the “Full/Hot” marking – Remember, the reservoirs are designed to provide space for the fluid to expand, and you need that extra bit of room for this to happen. Make sure that you use the coolant that is appropriate for your vehicle (stated on the cap or in your manual, OR you can consult Dr. Google for coolant specs by year/make/model or VIN) and make sure the coolant that you add is a pre-mixed 50/50 coolant/water solution, or make a proper 50/50 mix of distilled water (not tap) and concentrated coolant, if needed.

— YOUR LIGHTS —
Low beams – CHECK!
High beams – CHECK!
Daytime Running Lights – CHECK!
Brake lights (Both OR all 3 if you have a high-mount) – CHECK!
Parking lights – CHECK!
Turn signals (Front and Rear) – CHECK!
Side Marker lights – CHECK!
Plate light/lights – CHECK!
Replace any/all burned-out bulbs where applicable. Yo – If you don’t know how, or cannot reach the spots where they live (engineers are working on ways to make this more difficult for the average Joe and Joanna daily,) drop by your favorite shop and ask them to replace it/them for you. Oh, snap – Not a Bulb issue? Have your favorite pro gearhead properly diagnose the situation to determine the problem.
— YOUR FILTERS —
AIR FILTER: This filters the air that your engine breathes and it lives under your hood where your engine air intake occurs. For maximum engine performance and consistency, make sure this baby is clean and unclogged. Not sure if it’s got life left? Hold it up to the light. Can you see through it? Kind of, not really, or no? Change it!
(Tech tip: Wanna save some bucks? Search Year+Make+Model+”airfilterreplace” on YouTube. Look simple? MOST of the time, it is. Just make sure you don’t break any tabs or bolts along the way, that your filter is facing the proper direction and that the filter is sitting flush after replacement or WHAM…Check Engine light city, or, even worse, a possible no-start condition could arise.)
CABIN FILTER: This filters the air that your passengers and YOU breathe in the cabin of your car. It generally lives behind or above the glove box. See “Air Filter” segment above for replace recommendations!
(Tech tip: Most cabin filters are easy to replace, especially once you get the hang of the tab removal, but search your Year+Make+Model+”cabinfilterreplace” on YouTube to determine if you want to give it the ol’ college try or have your mechanic do it.)
— YOUR BATTERY —
DO NOT TOUCH YOUR BATTERY if you are NOT experienced in already handling car batteries. No-no, no-no. No touchy. What I recommend as a pre-trip check is to LOOK at it…Is it clean, and free of fuzzy-looking, seafoam-green debris around the posts and terminals? Can you see the date on the battery – Is it new or fairly new? Is it “battery shaped” and odorless, not bloated and sulfuric-scented (eggy-smelling)? Does you car start right up? If the answer is “YES, Ma’am!” to all of the questions, you’re probably good to go, and remember NOT TO LEAVE DEVICES PLUGGED IN AND/OR LIGHTS ON WHEN THE CAR IS NOT RUNNING, as these things can drain even the strongest of batteries.
If you THINK you may be having battery issues, or just want to be extra-sure that your battery is living in a healthy state-of-charge, pop down to a garage or auto parts store and have them test your battery – It’s usually free and will answer the ultimate question in regards to replacement.
IMPORTANT: Do NOT leave home without jumper cables. If you are not already sure how to jump your vehicle, then LEAVE IT TO SOMEONE WHO DOES, or have an expert TEACH YOU HOW TO DO THIS before you leave! It’s easy to do, but the smallest mistake – and they are easier to make than you think – could be destructive to your vehicle, expensive or, in the worst case, DANGEROUS and DEADLY. We will discuss this process in the next blog in detail. (Oh, the anticipation…)
— WIPER BLADES —
SIMPLE – Make sure they work on all settings, ensure that the wiper jets work and make sure that the blades DO clear your windshield properly. If the motor and jets work fine but the blades aren’t clearing well, REPLACE THEM. You can’t drive if you can’t see, folks. Bonus – MOST retailers will throw them on for you after you purchase them.
(Tech tip: TIP! If a nice guy/gal is providing installation service for no additional cost, toss him/her a few bucks! It’s the price of a coffee, folks. Don’t be a tightwad, cheap-o. EVERYONE hates tightwads, cheap-o.)
— BRAKE PADS, ROTORS, SHOES and DRUMS —
Can you see ‘em through the wheel/rim? Do you know what you’re looking for? Can you see the inboards as well as the outboards? Do you have drums and shoes in the rear that you are unable to assess without lifting the vehicle and removing the tires? Do you know what the hell you’re doing?
If you don’t know how to check your brakes or if they aren’t visible at a glance, stop by your favorite garage and have the qualified dudes/dudettes give ‘em a peek before you ship out. THE ABILITY TO STOP YOUR VEHICLE = Kind of important, you know? Make sure that your vehicle is able to safely perform this function. If you DO know how to properly check your pads, rotors, drums and shoes, DO IT – I don’t need to tell you that paying to performing a full brake job mid-trip at a big-box auto shop is NOT the way you want this to play out. (“Cha-CHING!”)

OKAY, OKAY – WHY ARE WE PUSHING THE TRIP-CHECK ON YOU GUYS?
WE WANT YOU to be preemptive – Lost time = missed sets, and the best, hungriest bands ALWAYS play EARLY, because some corny record label hasn’t purchased them a “prime spot.” Get there EARLY and support the bands that do it for the love of the music, not for the paycheck or for “scene points”!
Be ahead of the game, kiddos. These simple checks and tips can save you time, money and aggravation, and, heck – Would you rather spend your weekend fretting on the side of the road, subjected to the incessant bitching of your traveling companions and/or bandmates or partaking in the enthusiastically executed blazing tunage of ragers, anyway?!
This concludes today’s transmission of our program, Earthlings…
…Now – Head out to the highway. You’ve got nothin’… to lose… at… ALL!
Stay tuned for another interstellar encounter of the automotive kind during our next interplanetary pit stop.
Over… And OUT.